Profile
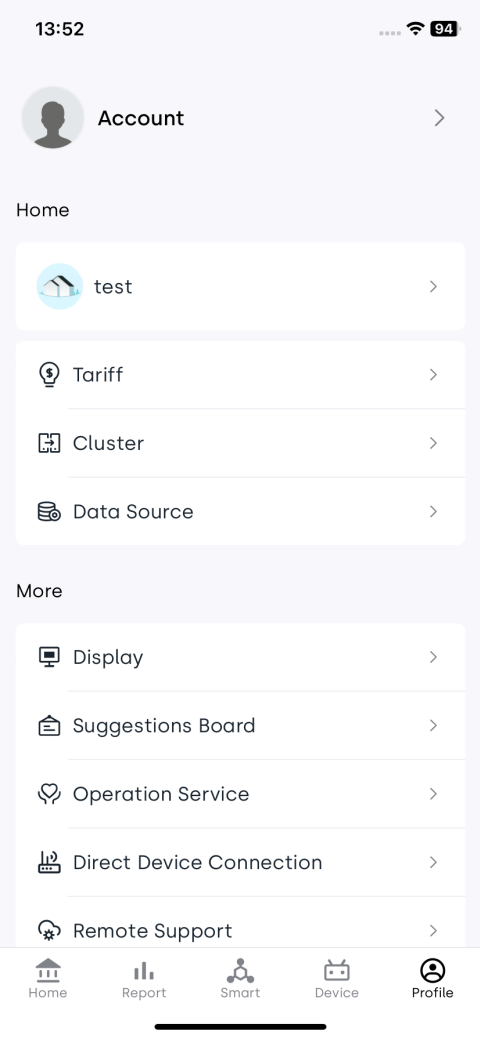
Click the Profile tab in the bottom navigation bar to enter the page. This page is used to manage account information, adjust app settings, and configure personalization options.
1. Account
Tap Account to enter the account settings page, where you can view and manage all account-related configurations.
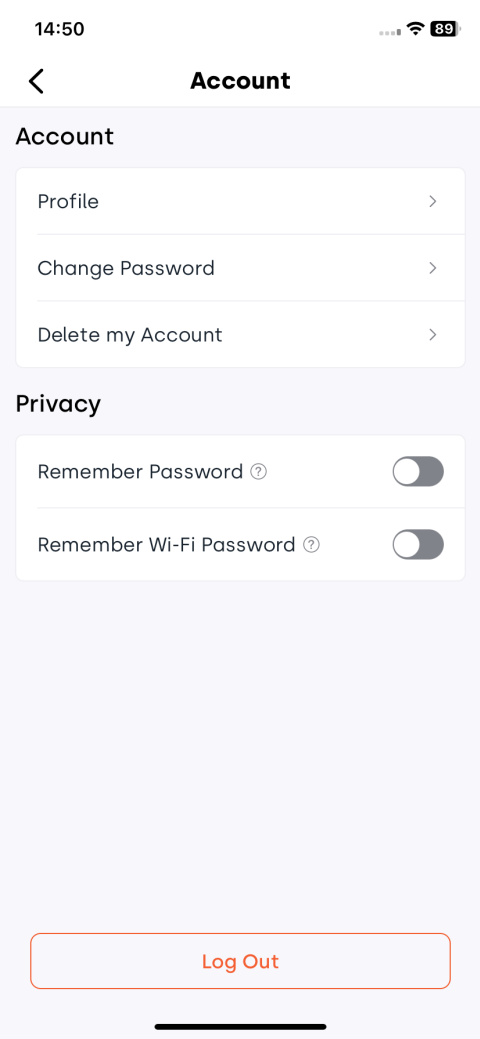
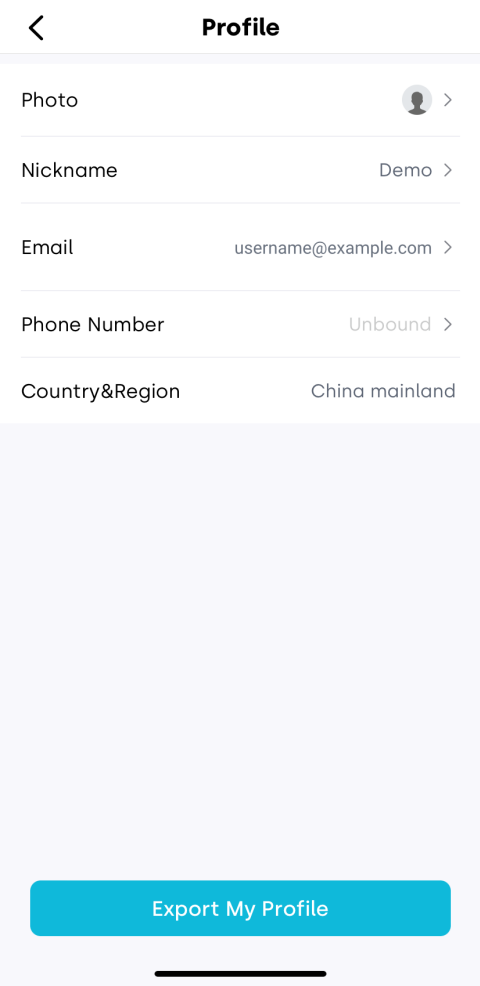
1.1 Profile
Tap Profile to enter the detailed account page where you can update your profile picture, change your username, and update your bound email or phone number.
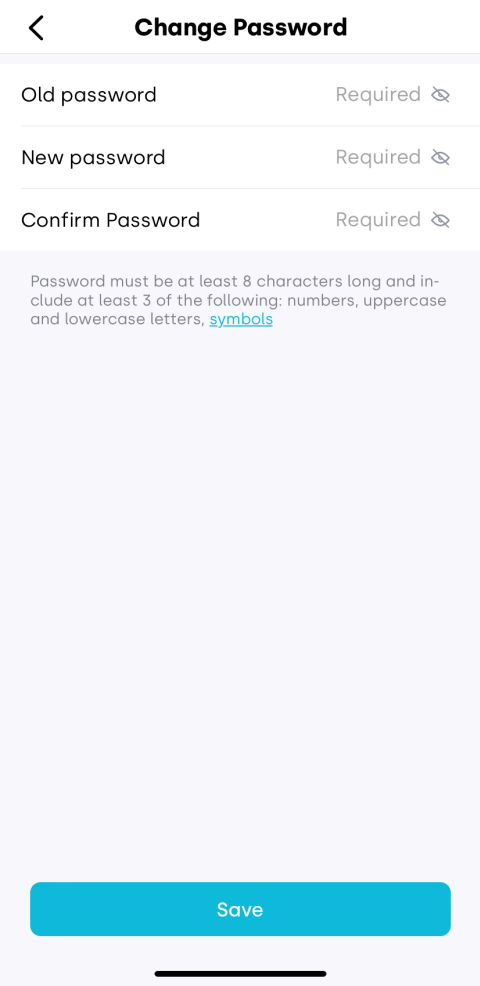
1.2 Change Password
Tap Change Password, then follow the instructions to enter your current and new passwords. After saving successfully, the system will automatically redirect you to the login page, where you can sign in again using the new password.
1.3 Delete Account
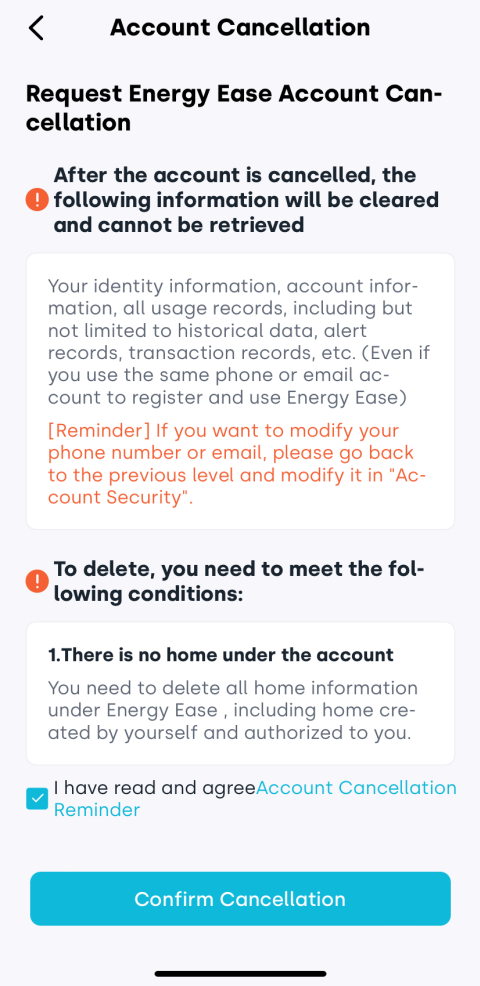
Deleting your account will permanently erase all associated data and cannot be undone. Please proceed with caution.
-
Delete all homes under your account.
-
Tap Delete My Account to begin the account cancellation process.
-
Carefully review the on-screen instructions and the “Account Cancellation Reminder”. Confirm that you meet the conditions and understand the consequences. If no concerns, check I have read and agree Account Cancellation Reminder.
-
Tap Confirm Cancellation to proceed.
-
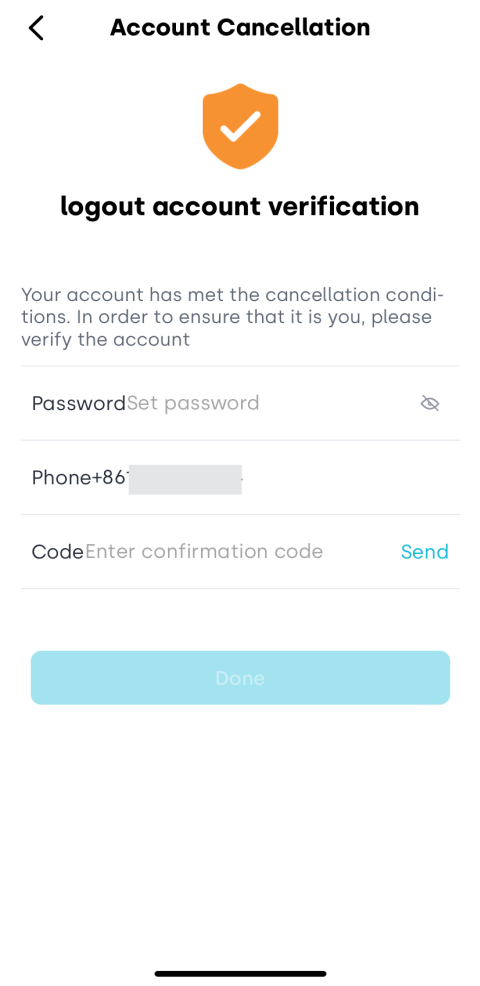
For security, the system will require identity verification: enter your password and verify your bound phone number or email.
-
Enter the confirmation code received, then tap Done to complete the account deletion.
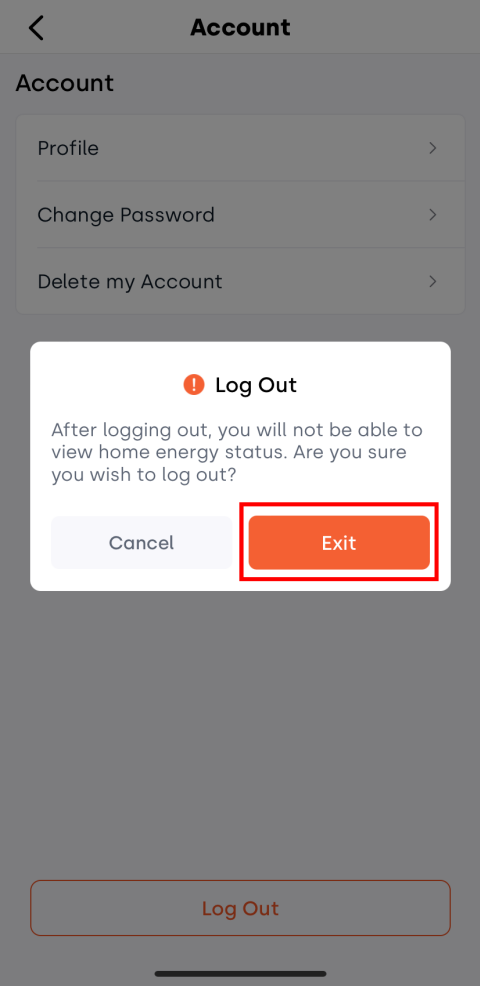
1.4 Log Out
Tap Log Out to securely exit your current account. The system will return to the login page.
1.5 Remember Password
The Remember Password feature allows you to save your account login password and the Wi-Fi password used during device network setup, so you won’t need to enter them repeatedly.
You can enable or disable password saving (including both login and Wi-Fi passwords) anytime by toggling the Remember Password switch.
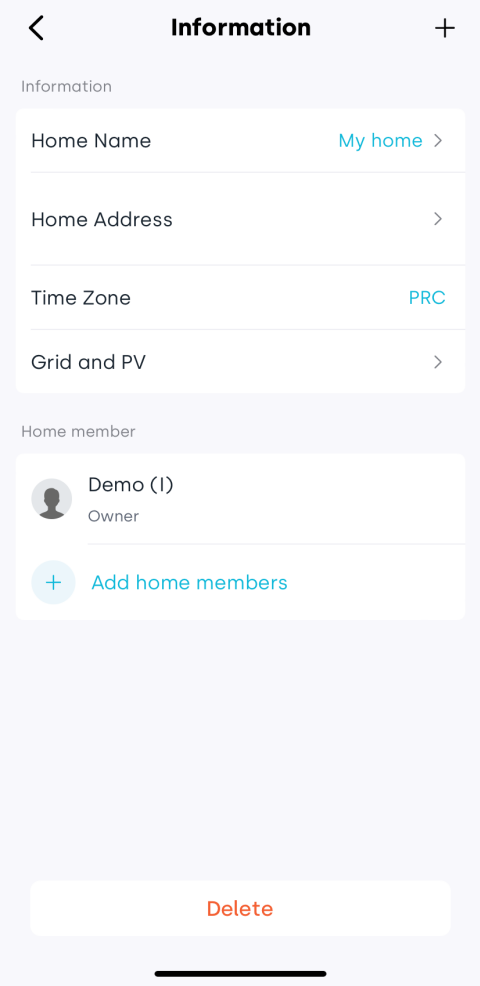
2. Home
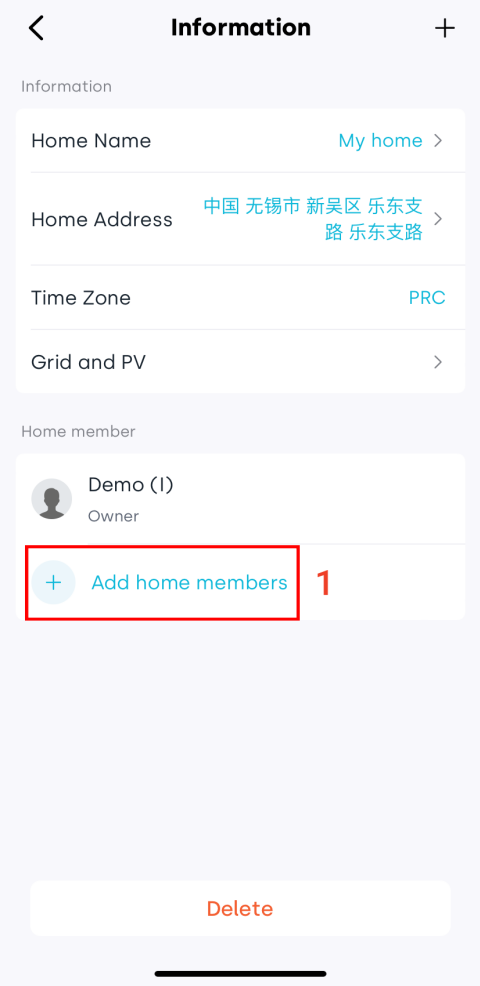
Tap your current home name to enter the home information page.
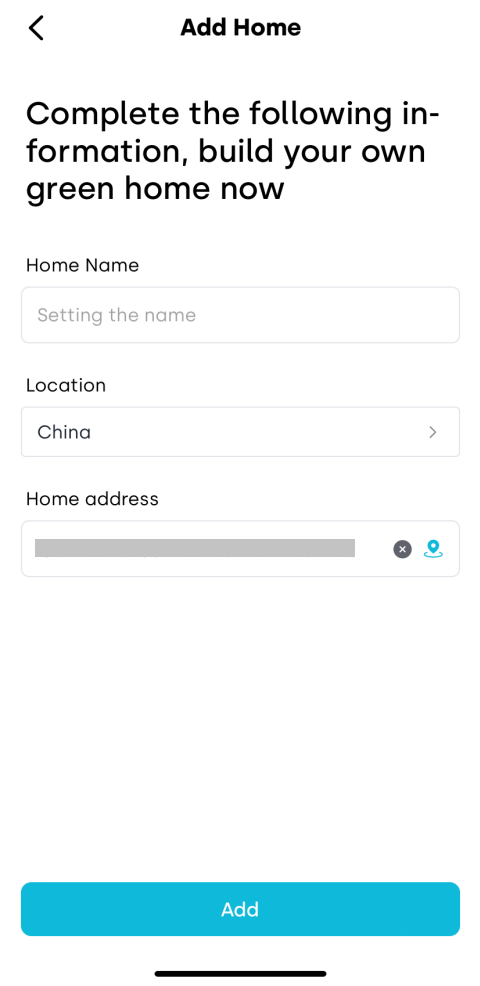
2.1 Add Home
-
Tap the + button in the upper right corner.
-
On the new page, complete the home information:
- Home Name: Set a recognizable name for the home.
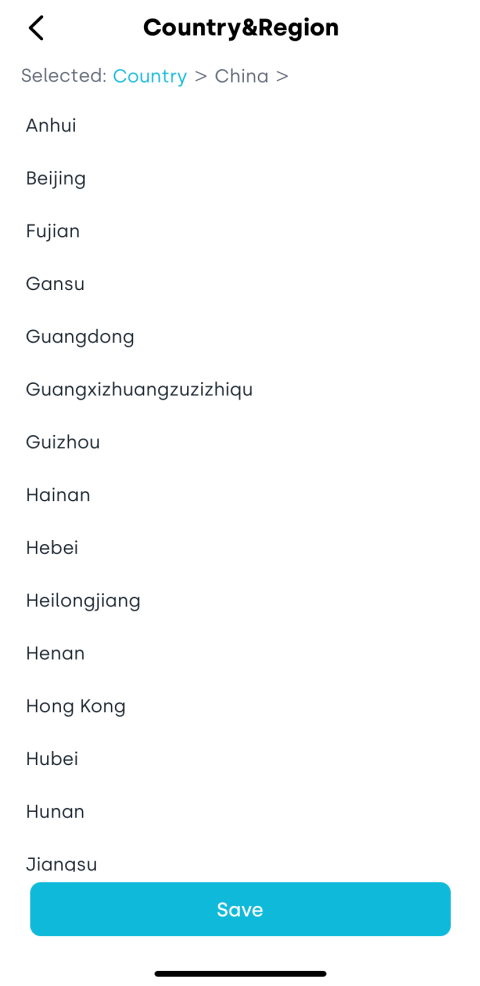
- Location: The app automatically detects your country; you may also manually select it.
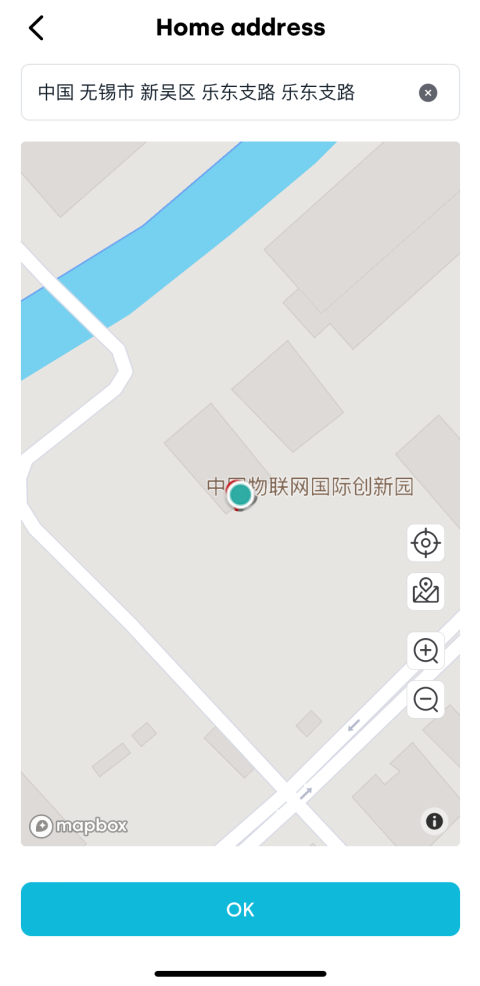
- Home Address: The app auto-fills an approximate area; you may tap the icon next to the address bar to re-locate on the Mapbox map.
-
After confirming all information, tap Add. The new home will immediately appear in your home list.
2.2 Edit Home
You can edit the following home information:
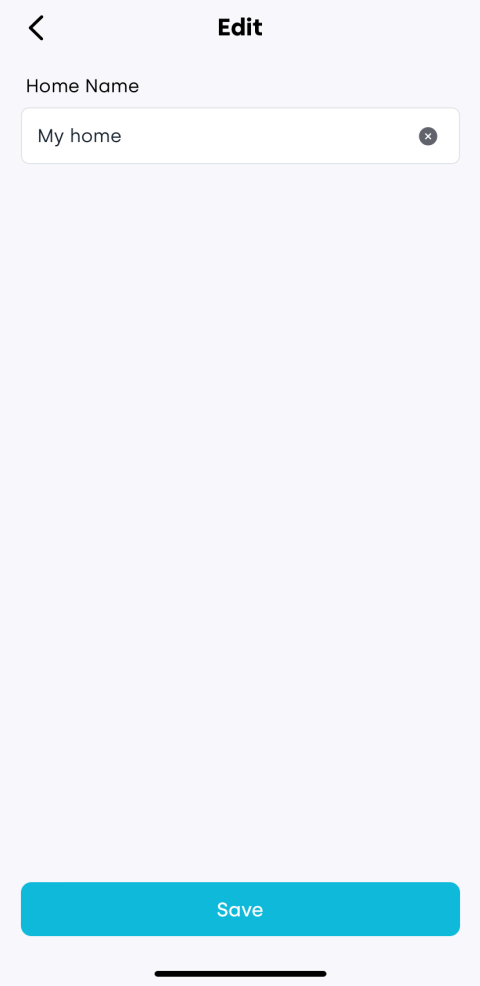
2.2.1 Home Name
Tap the name field to modify it.
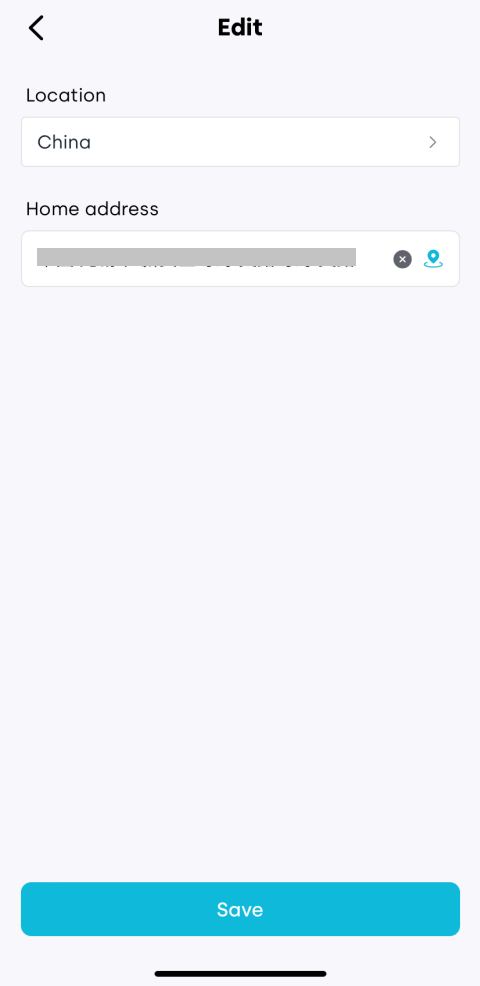
2.2.2 Home Address
Tap the address field to reselect or relocate.
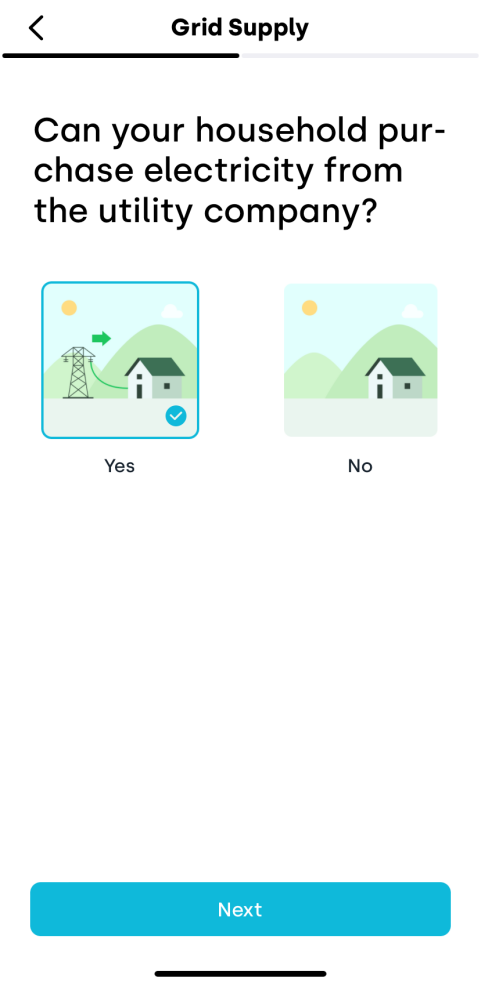
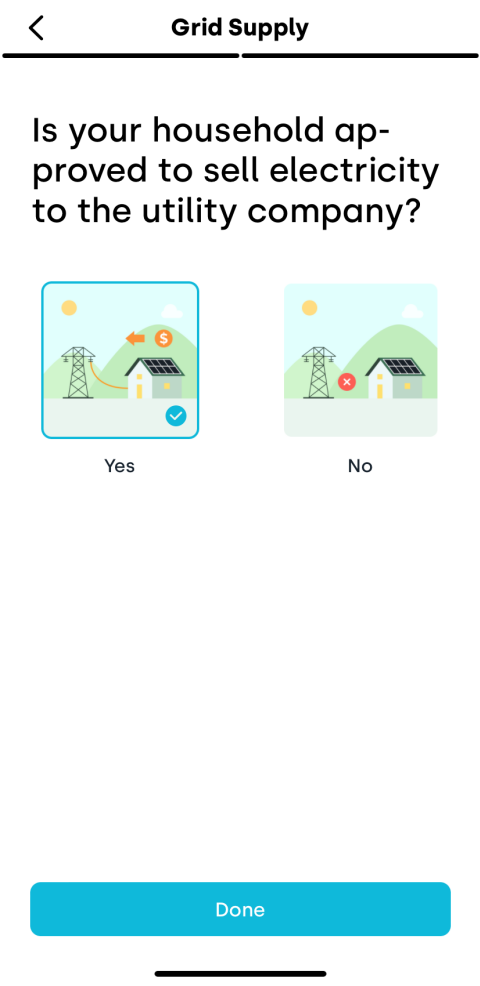
2.2.3 Grid and PV
Configure your home's electricity usage and feed-in options:
-
Whether you purchase electricity from the utility company.
-
Whether your household approved to sell electricity to the utility company.
2.2.4 Add Home Member
-
Tap Add home members.
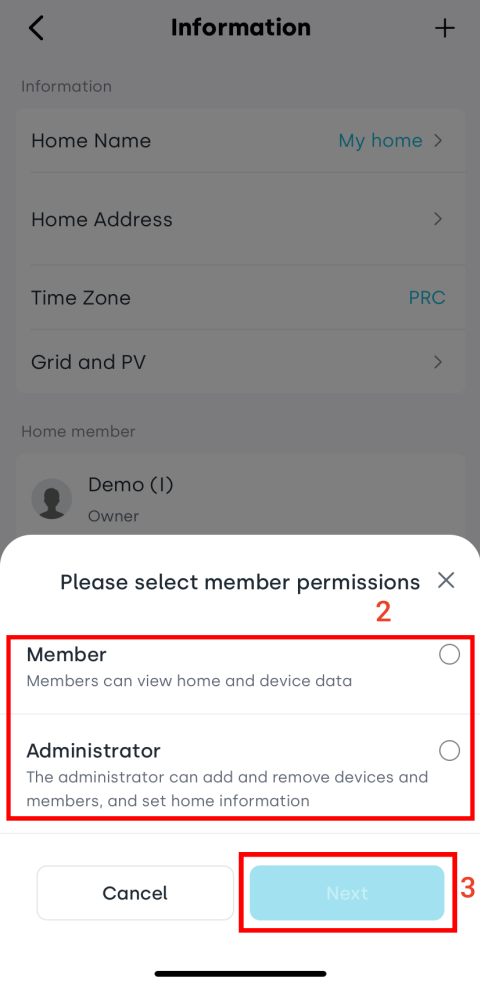
-
Select the member’s permissions:
Permission Description Member View home and device data only. Administrator Can add and remove devices and members, set home information. -
Tap Next.
-
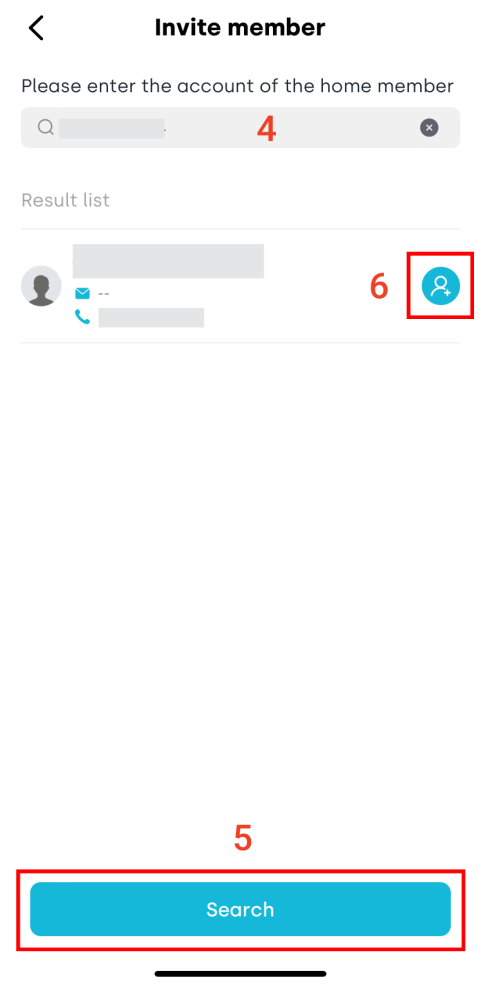
Enter the user’s account (email or phone number).
-
Tap Search.
-
In the search results, tap the add icon next to the user.
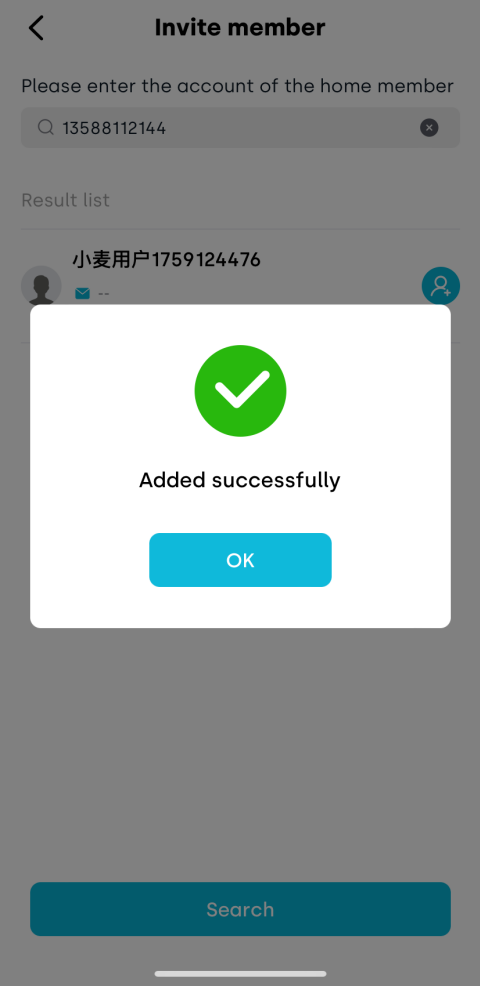
-
When the Added successfully message appears, the process is complete.
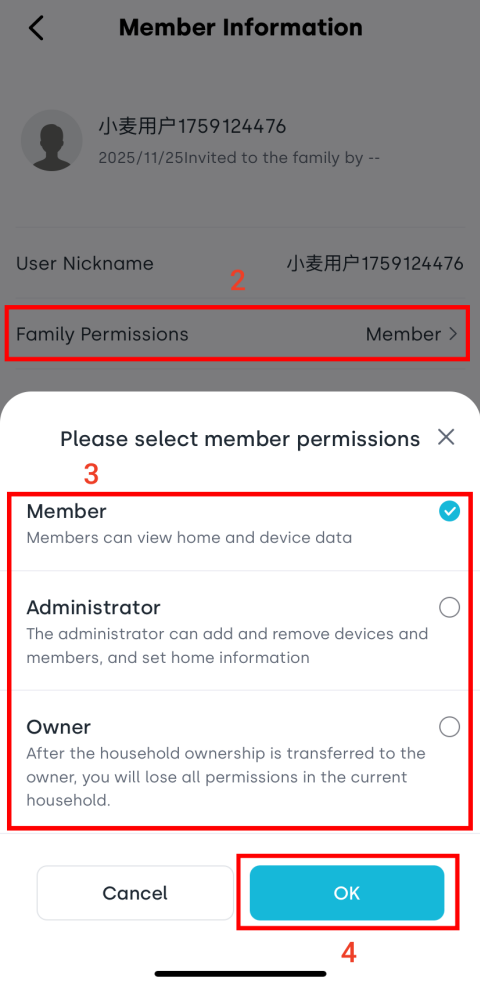
2.2.5 Manage Home Member Permissions
-
In the member list, tap the member whose permissions you want to modify.
-
Tap the Family Permissions field.
-
Choose a new permission level:
Permission Description Member View home and device data only. Administrator Can add and remove devices and members, set home information. Owner Transfers home ownership; you will lose all permissions for this home. -
Tap OK.
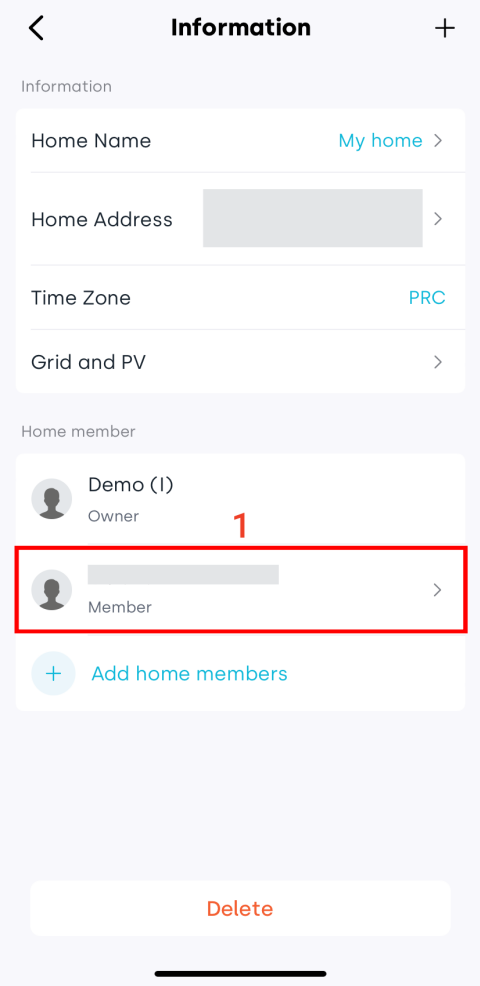
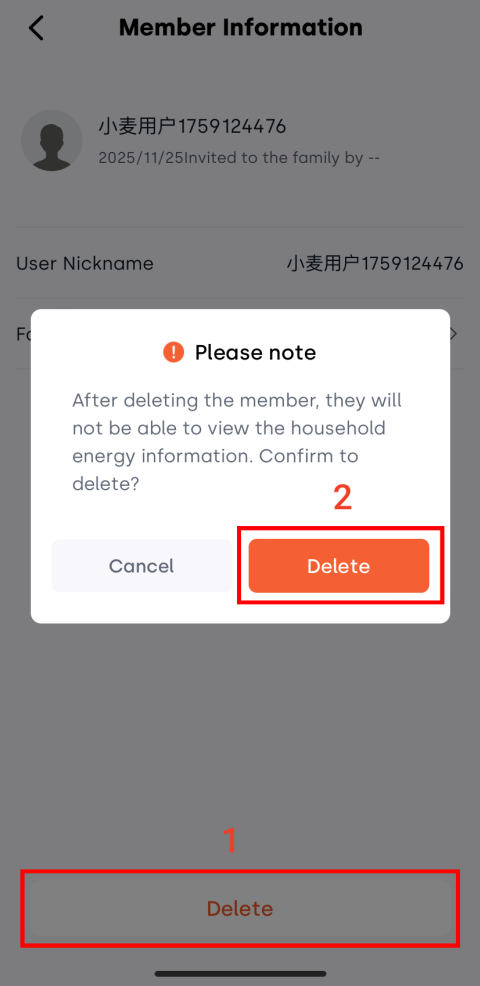
2.2.6 Remove Home Member
At the bottom of the member information page, tap Delete. The app will ask for confirmation; after confirming, the member will be removed.
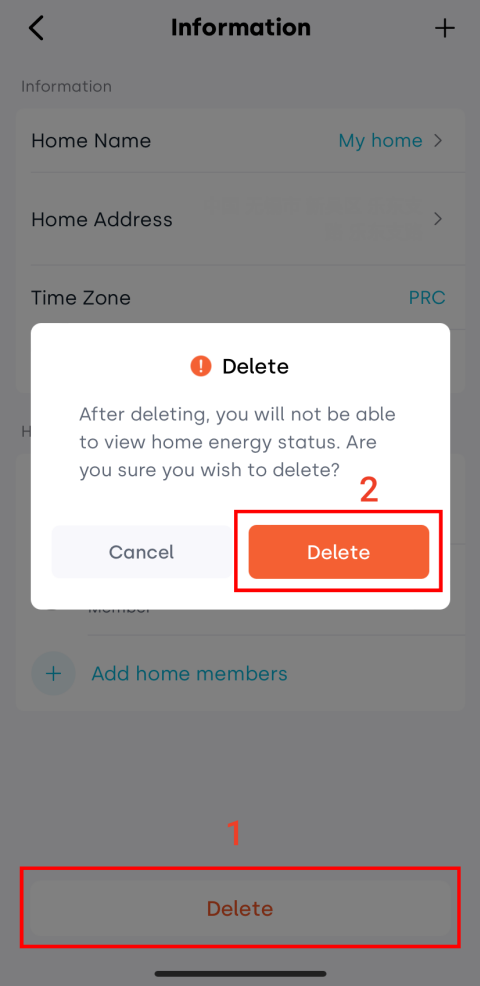
2.3 Delete Home
This action is irreversible and will erase all data for this home. Please proceed carefully!
At the bottom of the home management page, tap Delete. After confirmation, the home will be removed.
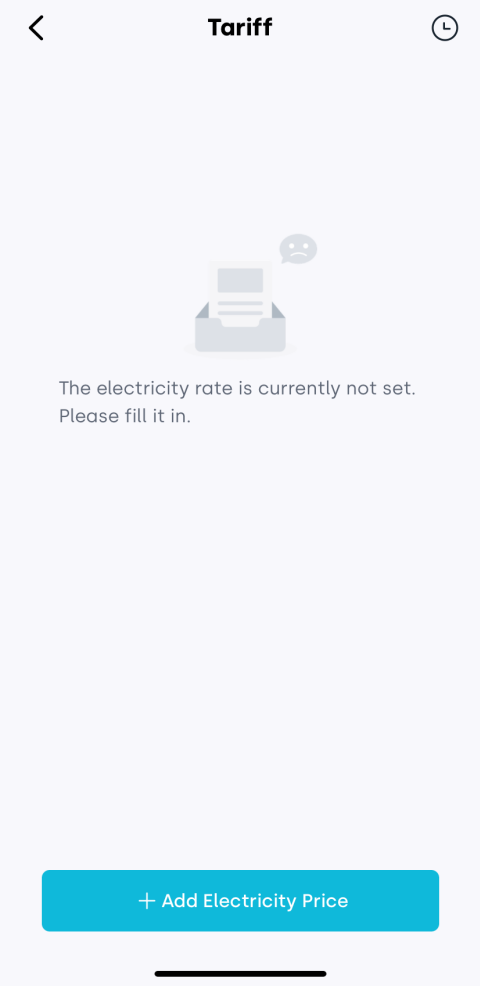
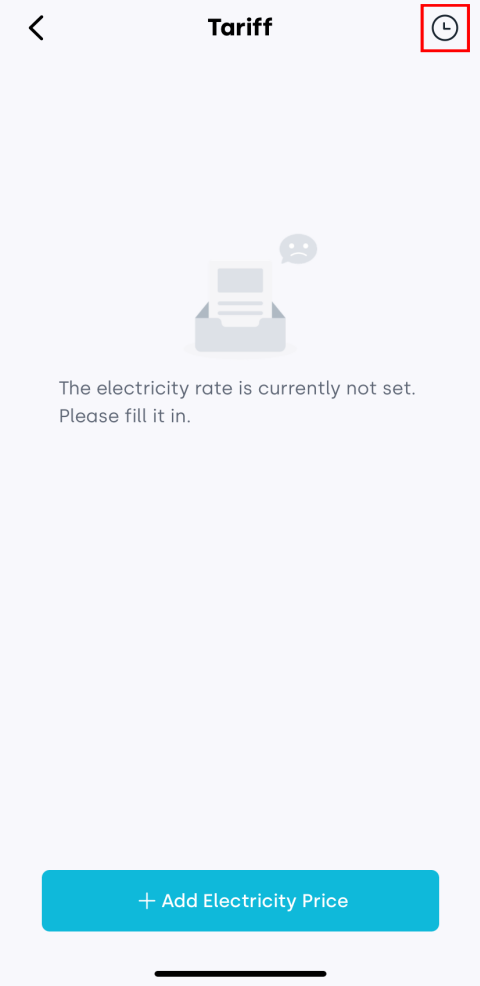
3. Tariff
Tap Tariff to enter the electricity price management interface.
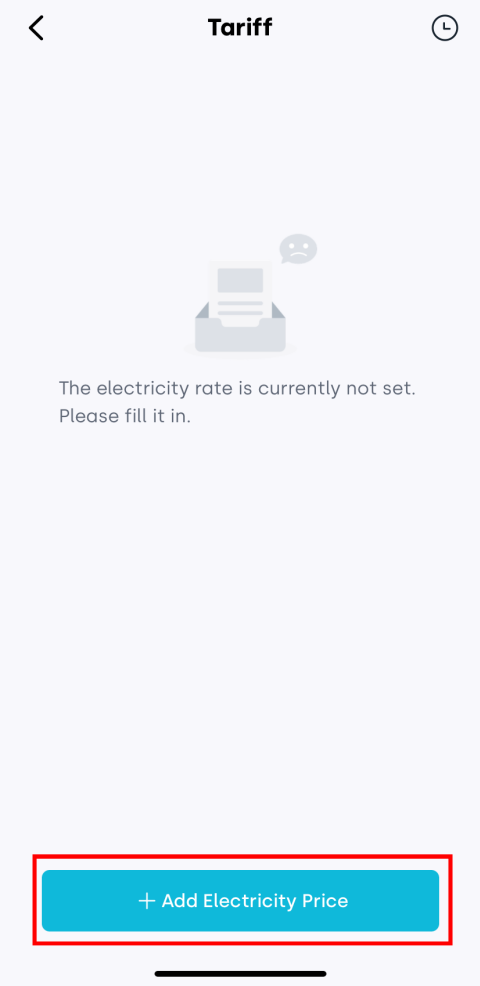
3.1 Add Tariff
Tap + Add Electricity Price to create a new purchase or selling price plan.
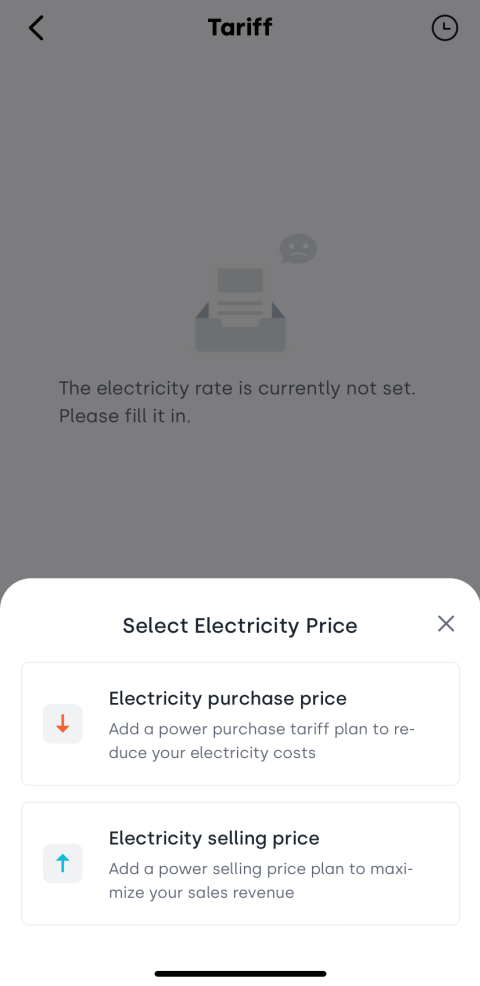
The setup process for purchase and selling prices is similar. The purchase price is used as an example below:
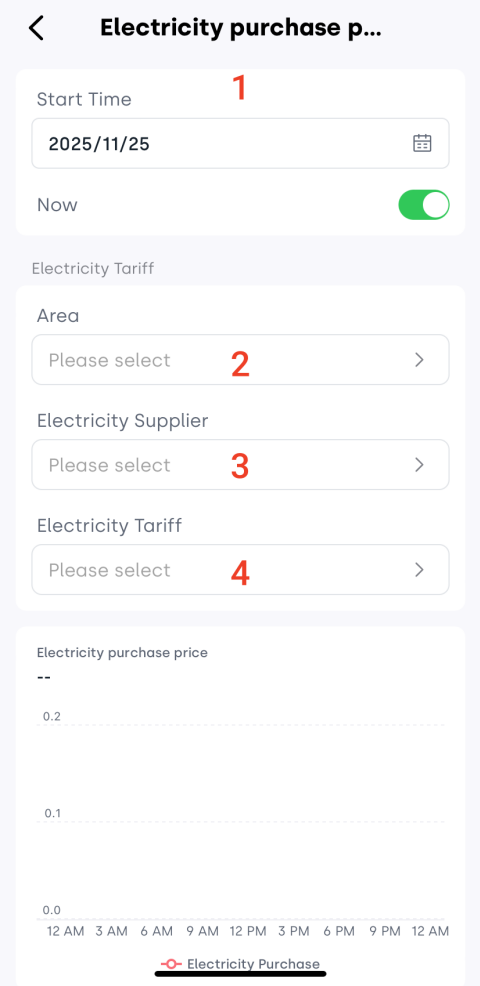
-
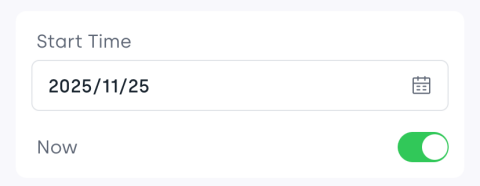
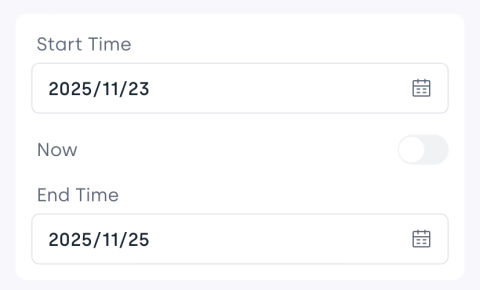
Set the start and end time for the tariff.
-
The end time is set to “Now” by default, meaning the price will remain effective.
-
To set electricity prices for a historical period, turn off the “Now” toggle and manually select the time range.
-
-
Select your home’s area.
-
Choose your electricity supplier from the list.
-
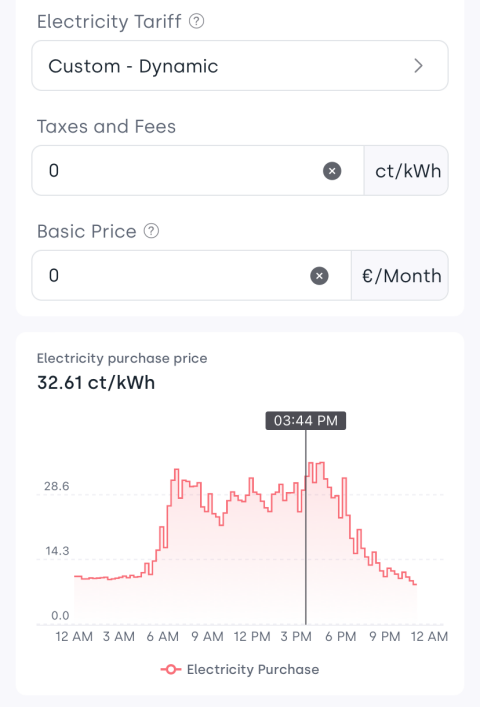
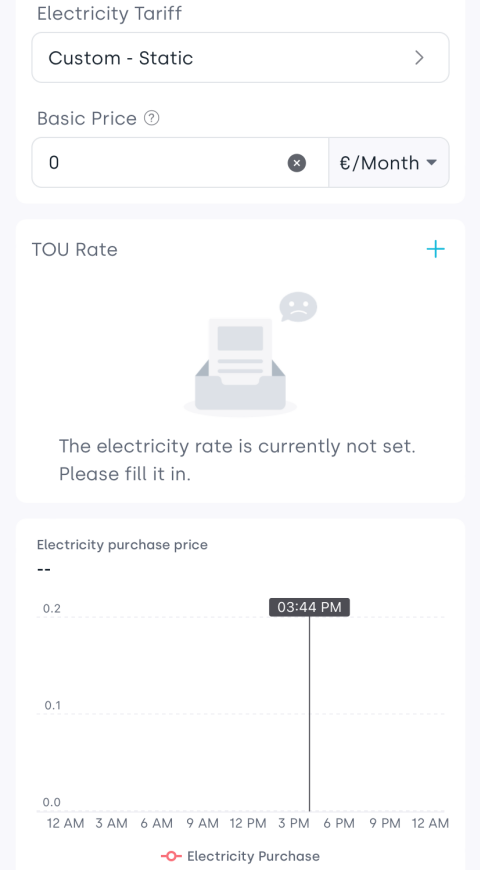
Configure the electricity tariff plan:
-
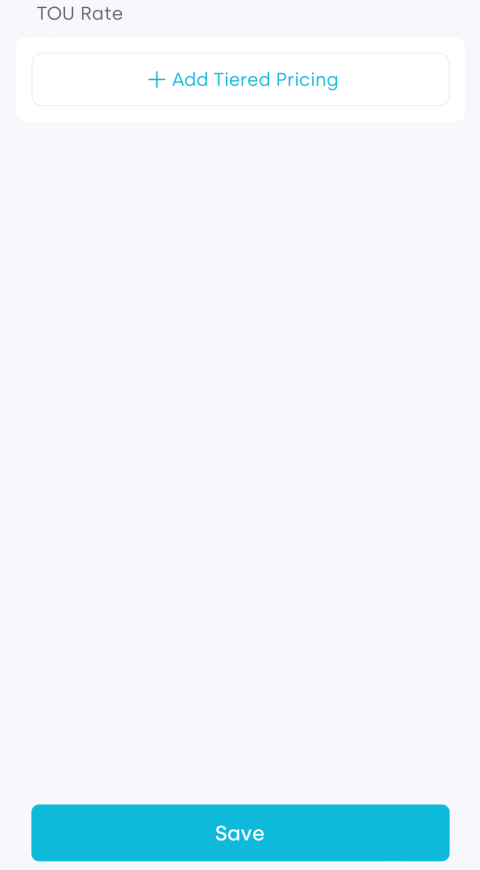
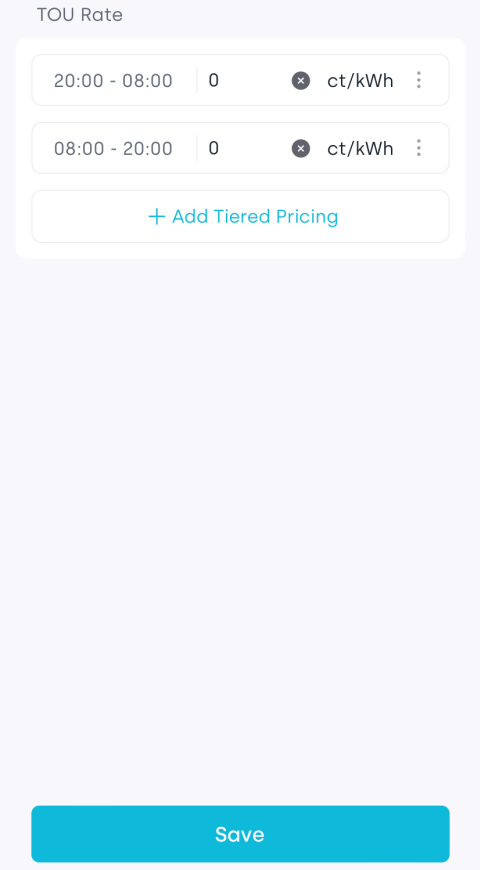
Dynamic: Requires setting taxes and the monthly fixed base price.
-
Static: Requires setting the base price and the time-of-use (TOU) rates for different periods.
-
-
Tap Save.
The tariff settings here are used for in-app visualization and estimation only. Actual billing is subject to your electricity provider’s official data.
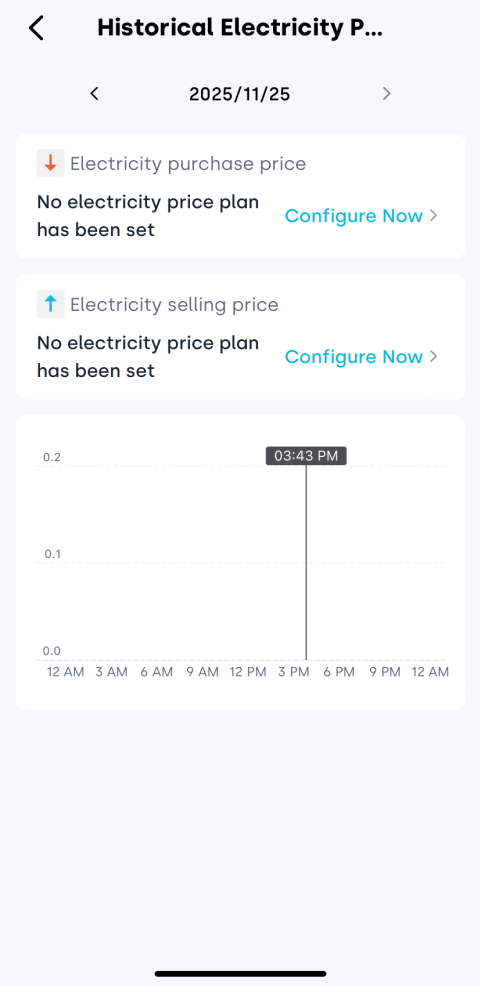
3.2 View Historical Tariffs
Tap the icon in the upper right corner to view past electricity price.
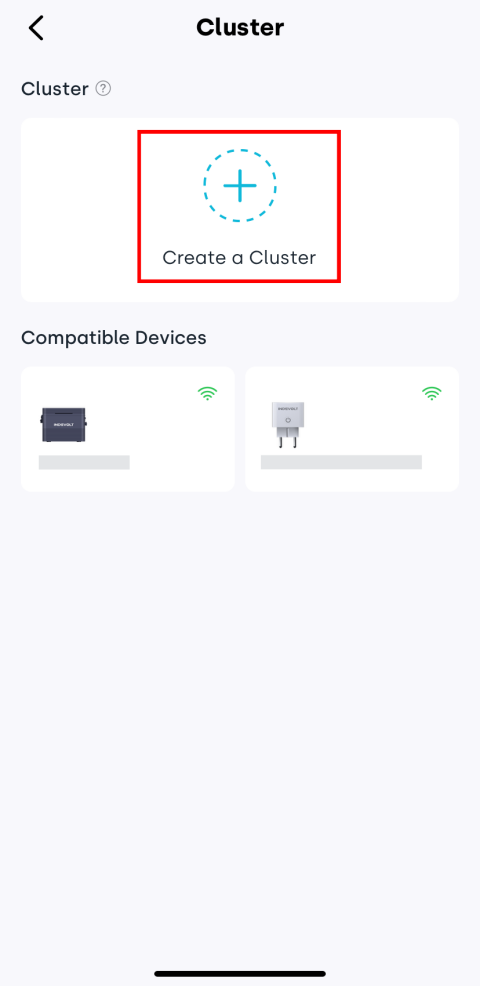
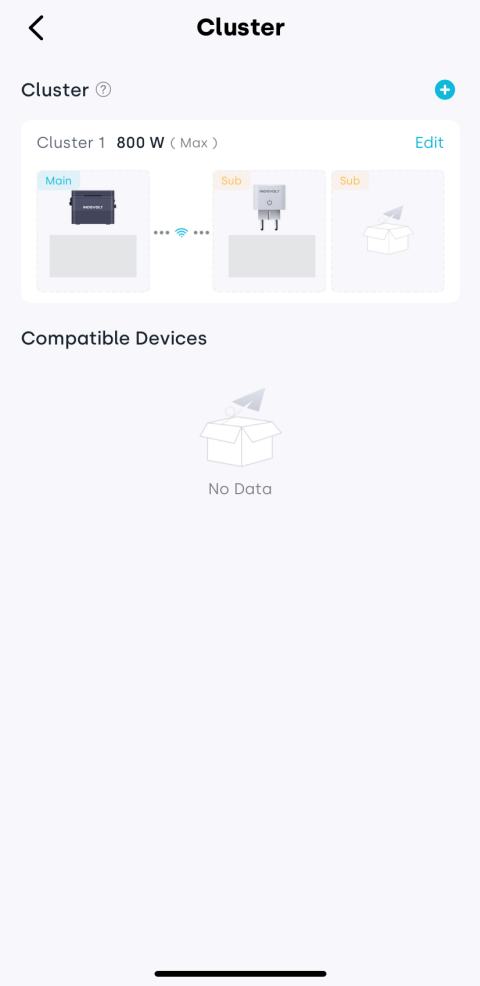
4. Cluster
Cluster settings allow you to combine multiple energy storage devices or inverters - via wired or wireless connections - into a unified system for expanded capacity and load balancing.
- At least one energy storage device and one compatible device must exist in the current home.
- All devices participating in clustering must be powered on and connected to the same Wi-Fi network.
You must configure main-sub mode: designate one device as the main device, with the others acting as sub-devices, coordinated by the main.
The following table shows which models support main/sub roles:
| Wired | Wireless | |||
|---|---|---|---|---|
| Model | Main | Sub | Main | Sub |
| BK1600 | ✗ | ✓ | ✓ | ✓ |
| BK1600 Ultra | ✓ | ✓ | ✓ | ✓ |
| PowerFlex 2000 | ✓ | ✓ | ✓ | ✓ |
| SolidFlex 2000 | ✓ | ✓ | ✓ | ✓ |
| Smart Plug | ✗ | ✓ | ✗ | ✓ |
Steps:
-
Tap Cluster.
-
Tap Create a Cluster.
-
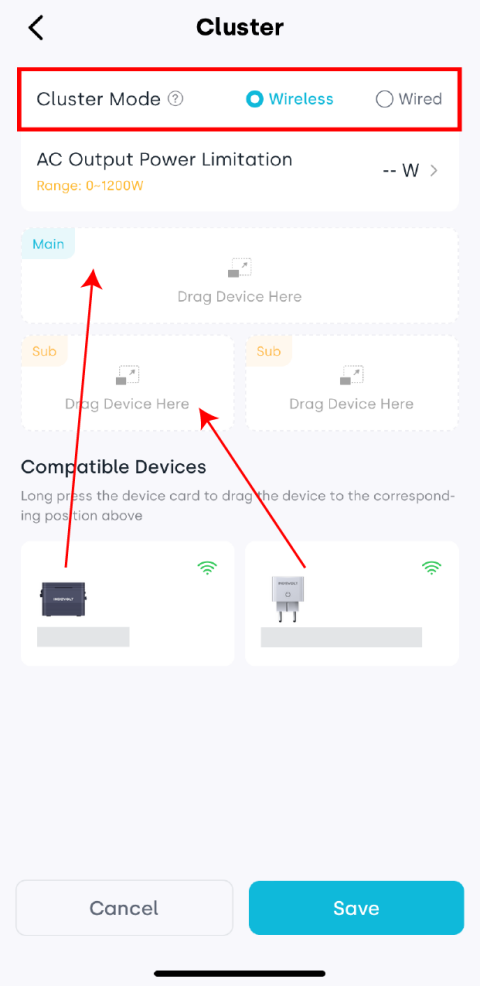
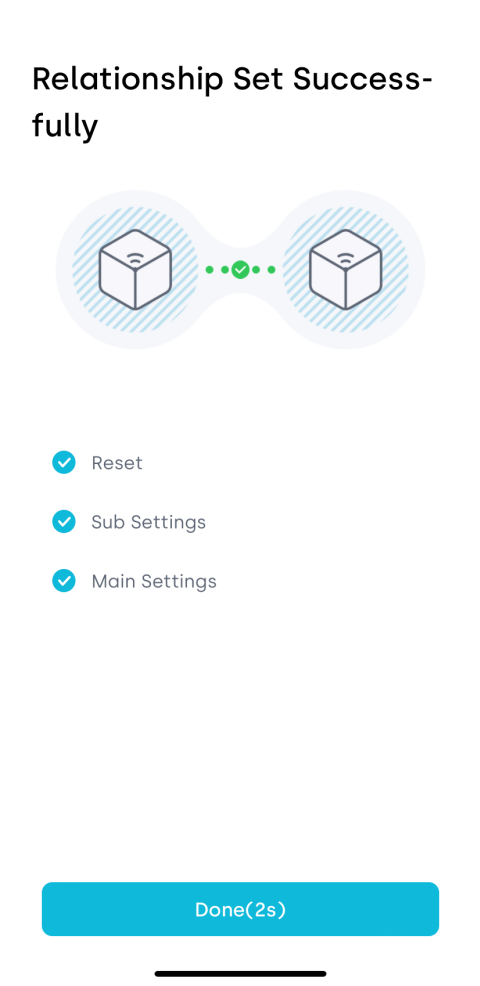
Select Cluster Mode: wireless or wired. Press and hold device cards and drag them into the main or sub slots.
-
Set the AC Output Power Limitation according to grid regulations and local policies.
-
Tap Save to complete the cluster setup.

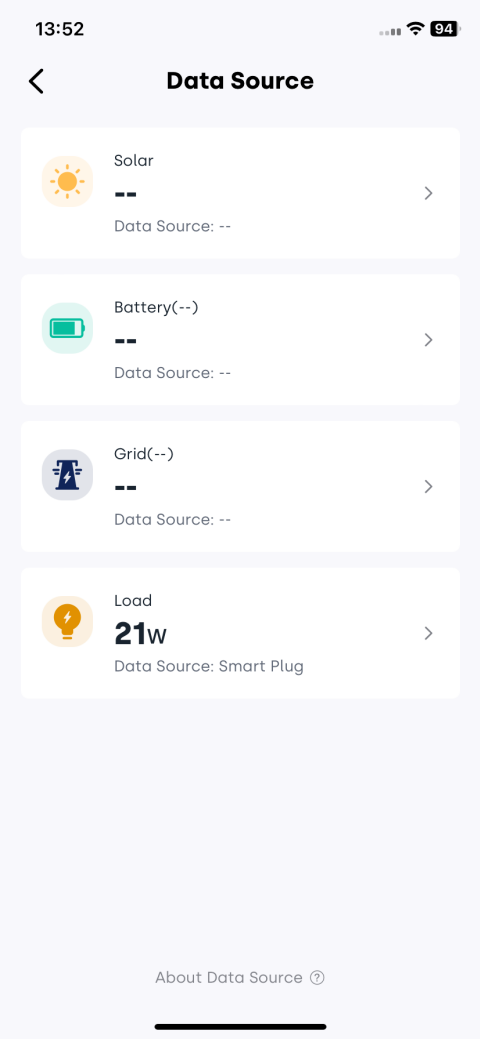
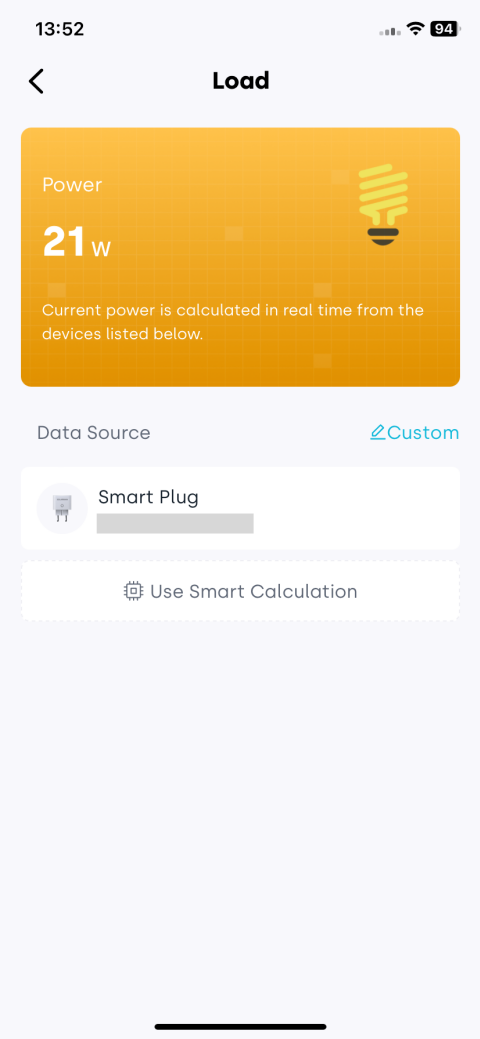
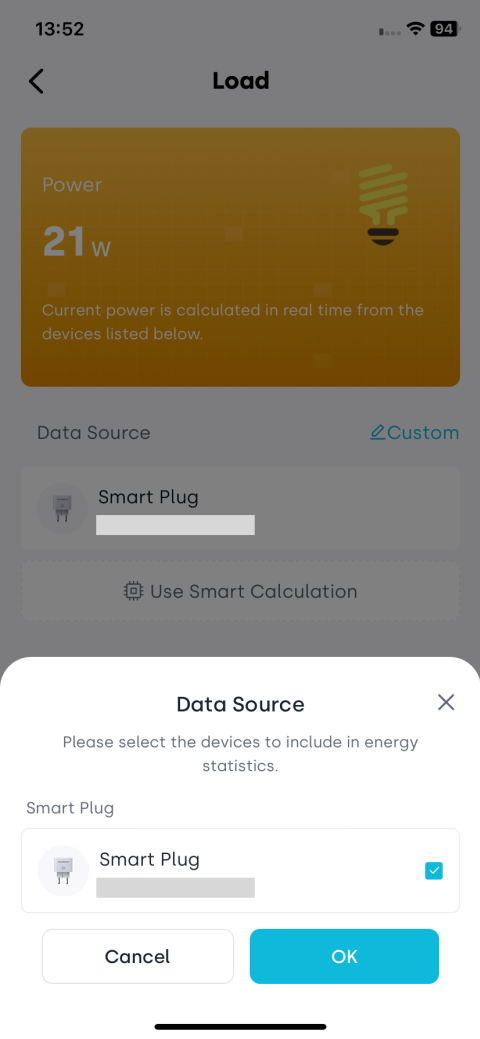
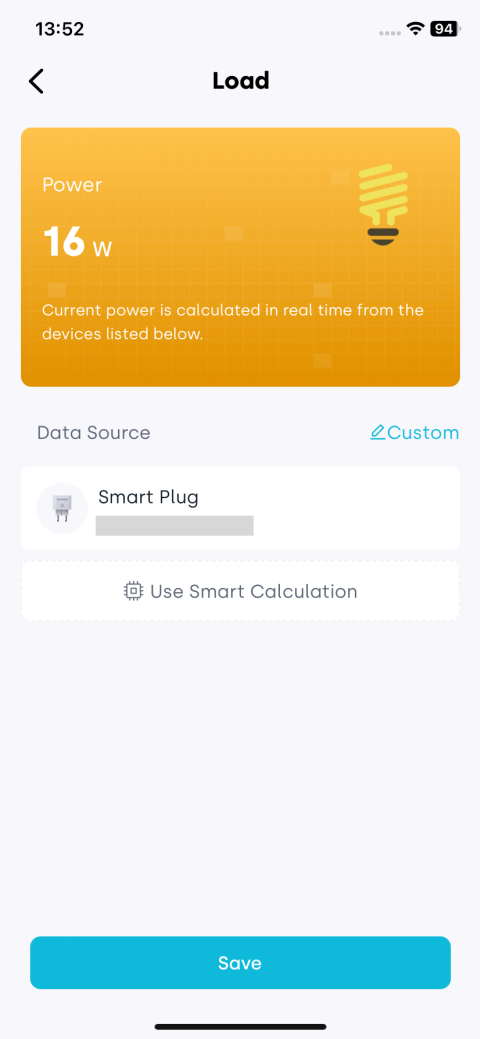
5. Data Source
With Data Source settings, you can specify the data sources used for home energy statistics to improve the accuracy and reliability of analytical results. The system supports four types of data sources: Solar, Battery, Grid, and Load.
-
Tap Data Source to enter the configuration page.
-
Select the data source type you want to configure.
-
Click Custom on the right and select one or more devices as the statistical input for this data source.
-
After completing the selection, tap Save to apply the settings.
6. Display
Tap Display to customize the app’s appearance and formatting preferences.
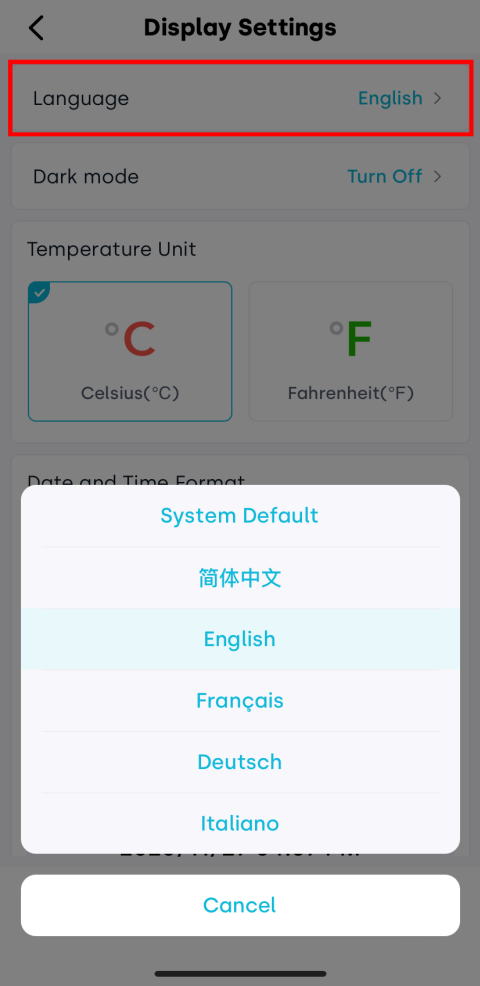
6.1 Language
Support multiple interface languages: Simplified Chinese, English, French, German, and Italian.
6.2 Dark Mode
Turn on or off dark mode to suit different lighting environments.

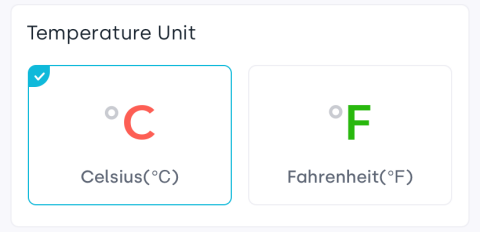
6.3 Temperature Unit
Choose your preferred temperature unit: Celsius (℃) or Fahrenheit (℉).
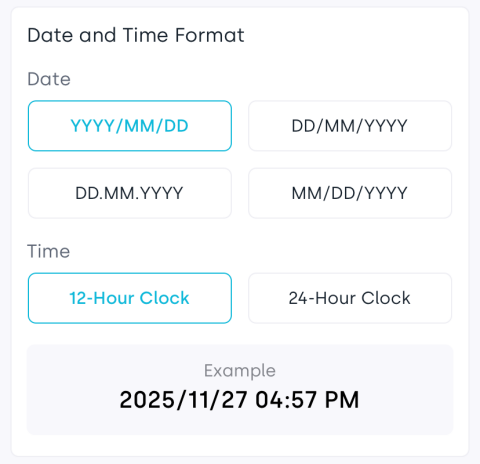
6.4 Date and Time Format
Customize the display format for date order and 12-/24-hour clock.
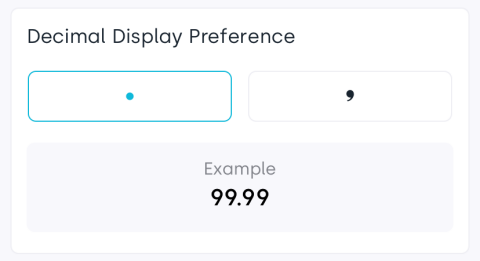
6.5 Decimal Display Preference
Select your preferred decimal separator: dot or comma.
Tap Save and all changes will take effect immediately. You can return anytime to adjust preferences.
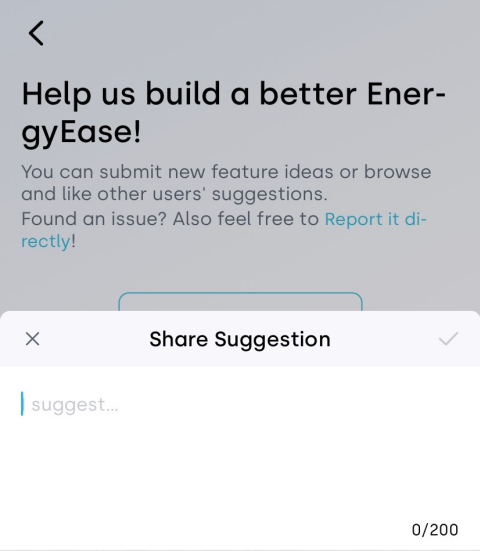
7. Suggestions Board
The Suggestions Board is your direct channel to communicate with us - submit product suggestions or report issues encountered during use.
Tap Suggestions Board to enter the feature.
You can perform the following actions:
-
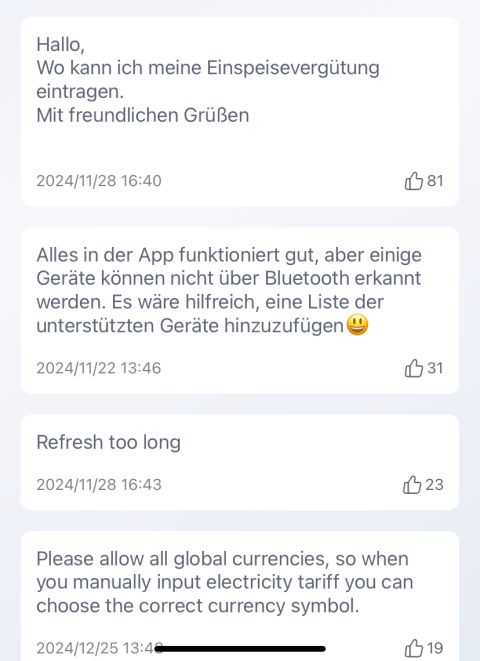
View suggestions: Browse feature suggestions and feedback from other users.
-
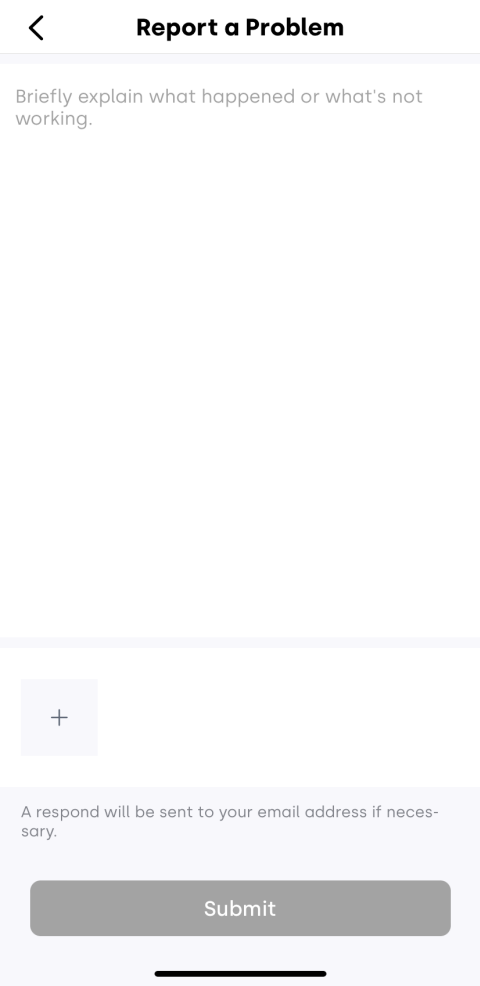
Report an issue: Tap Report it directly, describe the problem, and submit it.
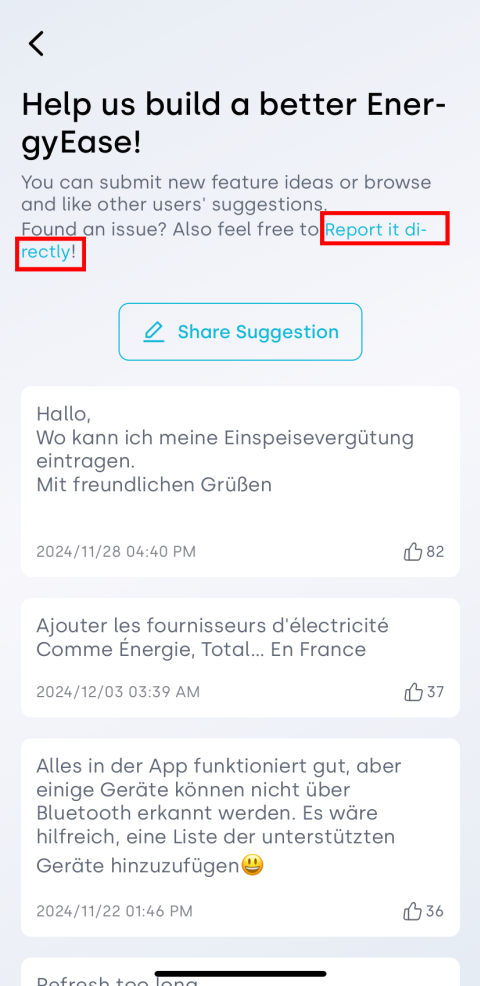
-
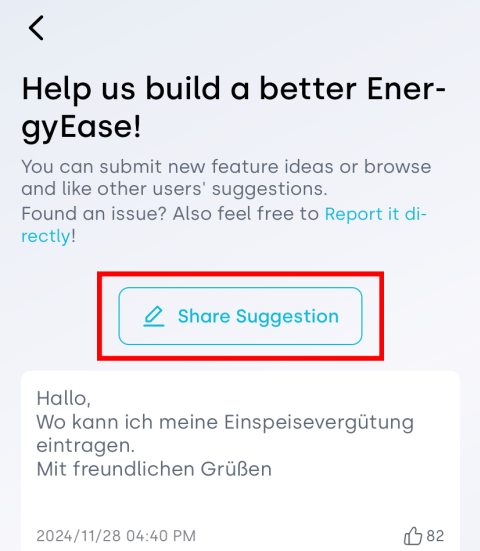
Share suggestions: Tap Share Suggestion to provide your ideas for improvements or new features.
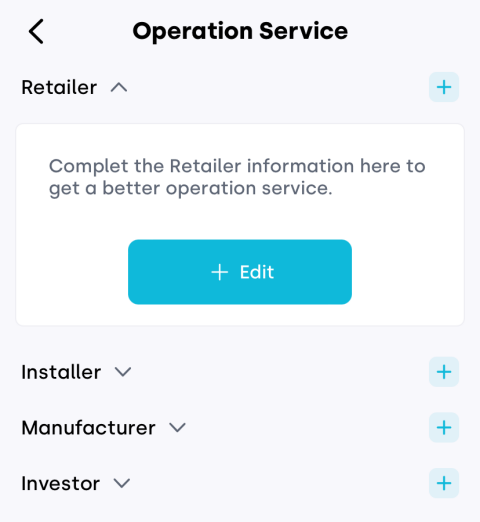
8. Operation Services
For easier maintenance, you can add and manage service providers (such as retailer and installers) via Operation Services. After authorization, a provider can view your basic device information to offer more accurate support.
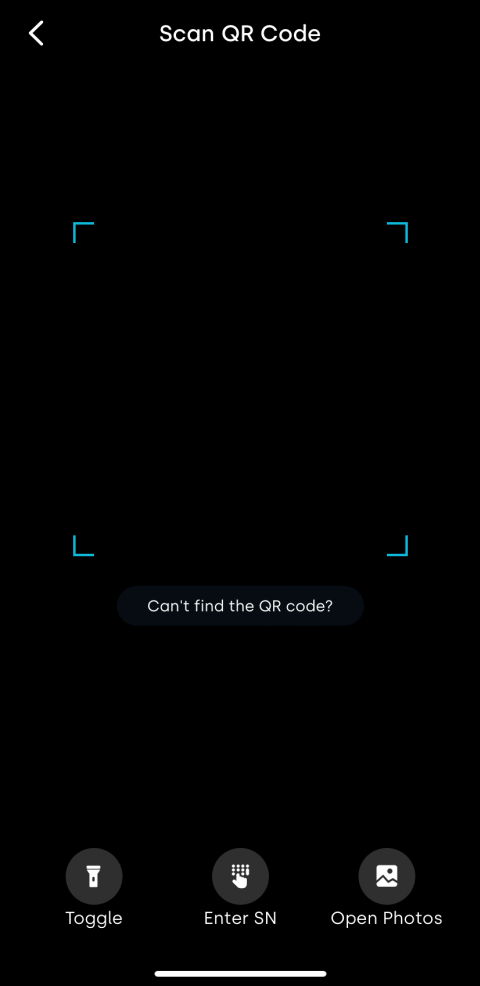
9. Direct Device Connection
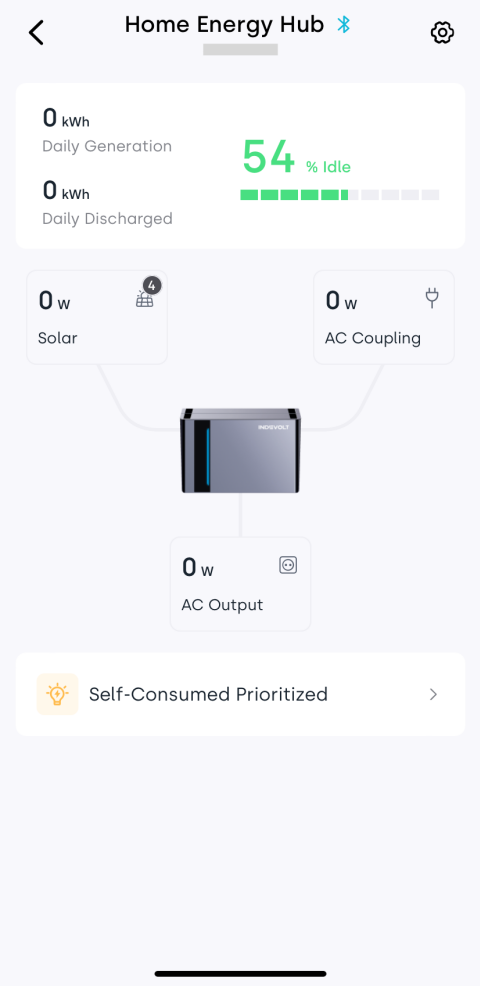
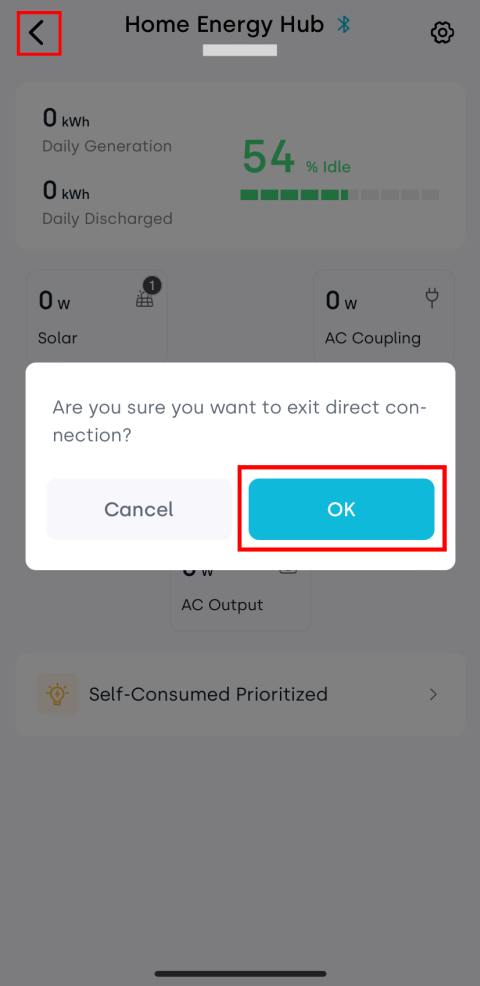
Direct Device Connection uses Bluetooth for nearby communication, allowing you to monitor and manage supported devices without connecting to the home network.
This feature currently supports INDEVOLT home energy storage system:
- BK1600
- BK1600 Ultra
- SolidFlex 2000
- PowerFlex 2000
More devices will be supported in the future. Please stay tuned.
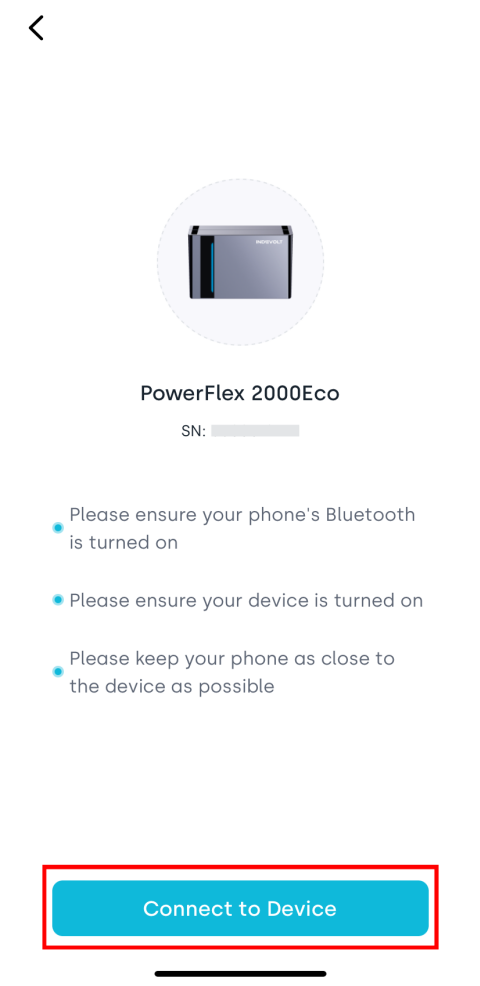
Ensure Bluetooth is enabled on your phone and the target device is powered on and ready for pairing.
-
Tap Direct Device Connection.
-
Scan the device QR code using the app for automatic identification.
-
Tap Connect to Device and move your phone close to the device. The system will establish a Bluetooth connection.
-
After successful connection, you may view real-time data, set charge/discharge schedules, and configure parameters.
-
Tap the back arrow (<) in the upper-left corner to exit.
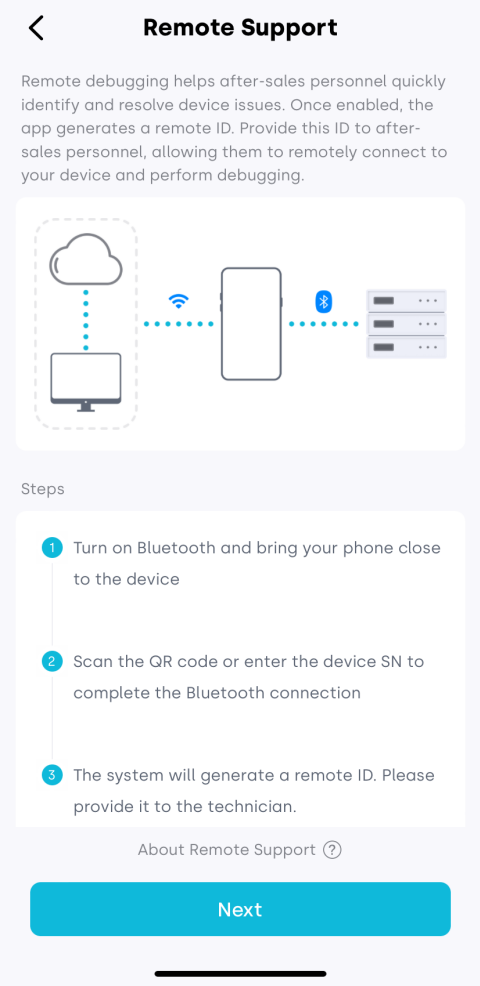
10. Remote Support
This function helps after-sales technicians quickly locate and resolve potential device issues.
- Ensure the device is powered on.
- Keep the Bluetooth connection stable during debugging. It is recommended to set your phone screen to stay awake to avoid disconnection.
-
Tap Remote Support.
-
Read the information and tap Next.
-
Scan the device QR code or manually enter the SN to establish a Bluetooth connection.
-
The system will generate a Remote ID. Provide this ID to the technician for remote diagnosis.

Exit Remote Support:
- Tap the Exit Support Mode button to manually end the remote debugging session.
- Alternatively, the technician can end the session, and the app will automatically notify you that the debugging has ended.
Device Connection Failed:
- Please make sure that Bluetooth is enabled on your phone and that it is successfully connected to the device.
- Tap Retry to re-establish the device connection.
- Keep your phone screen on and remain on the Remote Support page.
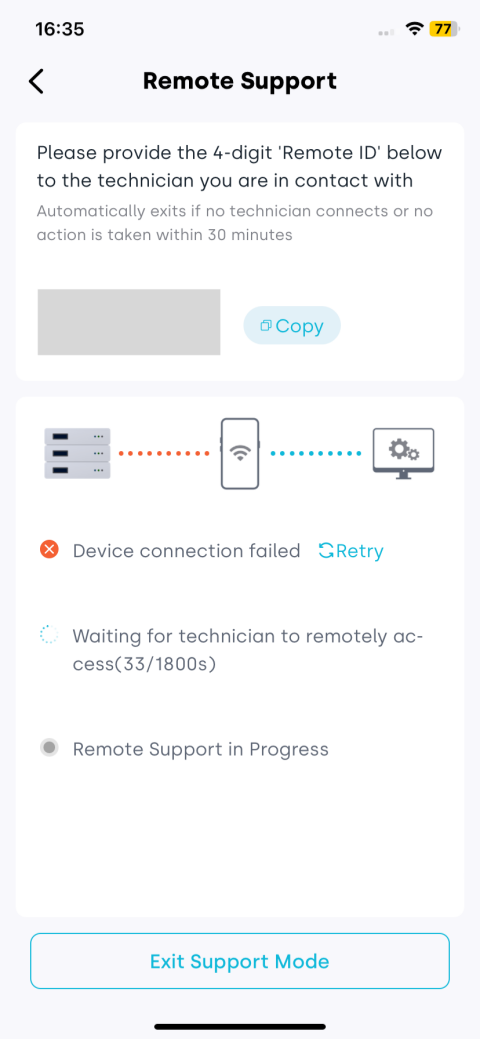
- The debugging process does not affect normal device operation.
- This feature is for authorized technicians only - do not share the ID with unauthorized parties.
- After debugging, please exit the mode to end the remote session and ensure security.
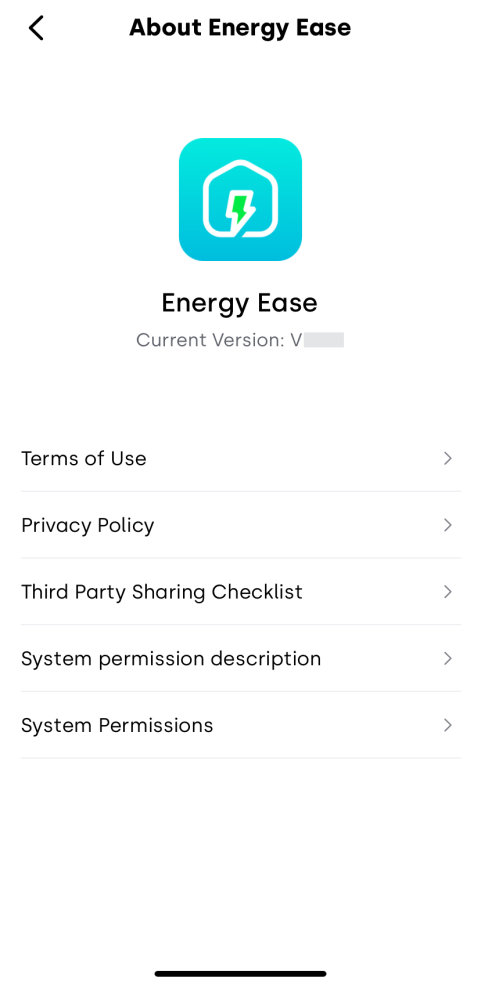
11. About Energy Ease
Tap About Energy Ease to learn more about the app, including the current version, service and privacy agreements, third-party information sharing list, permission descriptions, and system permission management.